
Get started with MicroCloud
MicroCloud is quick to set up. Once installed, you can start using MicroCloud in the same way as a regular LXD cluster.
This tutorial guides you through installing MicroCloud in a confined environment and then starting some instances to see what you can do with MicroCloud. It uses virtual machines in LXD, so you don’t need any extra hardware to follow the tutorial.
Tip
In this tutorial, we use four virtual machines in LXD for the MicroCloud cluster members. You can use a different number of machines if you want, but the minimum number of required machines is three.
We limit each virtual machine to 2 GiB of RAM, which is less than the recommended hardware requirements. In the context of the tutorial, this amount of RAM is sufficient. However, in a production environment, make sure to use machines that fulfil the Hardware requirements.
1. Install and initialise LXD
Note
You can skip this step if you already have a LXD server installed and initialised. However, you should make sure that you have a storage pool set up that is big enough to store four virtual machines. We recommend a storage pool size of at least 40 GiB for that.
Complete the following steps to install and initialise LXD:
Install
snapd:Run snap version to find out if snap is installed on your system:
user@host:~$snap versionsnap 2.59.4snapd 2.59.4series 16ubuntu 22.04kernel 5.15.0-73-genericIf you see a table of version numbers, snap is installed. If the version for
snapdis 2.59 or later, you are all set and can continue with the next step of installing LXD.If the version for
snapdis earlier than 2.59, or if the snap version command returns an error, run the following commands to install the latest version ofsnapd:sudo apt update sudo apt install snapd
Enter the following command to install LXD:
sudo snap install lxd
Enter the following command to initialise LXD:
lxd init
Accept the default values except for the following questions:
Size in GiB of the new loop device (1GiB minimum)Enter
40GiB.Would you like the LXD server to be available over the network? (yes/no)Enter
yes.
2. Provide storage disks
MicroCloud supports both local and remote storage. For local storage, you need one disk per cluster member. For remote storage, you need at least three disks that are located on different cluster members.
In this tutorial, we’ll set up four cluster members, which means that we need a minimum of seven disks (four for local storage and three for remote storage).
Complete the following steps to create the required disks in a LXD storage pool:
Create a ZFS storage pool called
disks:lxc storage create disks zfs size=100GiB
Configure the default volume size for the
diskspool:lxc storage set disks volume.size 10GiB
Create four disks to use for local storage:
lxc storage volume create disks local1 --type block
lxc storage volume create disks local2 --type block
lxc storage volume create disks local3 --type block
lxc storage volume create disks local4 --type block
Create three disks to use for remote storage:
lxc storage volume create disks remote1 --type block size=20GiB
lxc storage volume create disks remote2 --type block size=20GiB
lxc storage volume create disks remote3 --type block size=20GiB
Check that the disks have been created correctly:
root@micro1:~#lxc storage volume list disks+--------+---------+-------------+--------------+---------+| TYPE | NAME | DESCRIPTION | CONTENT-TYPE | USED BY |+--------+---------+-------------+--------------+---------+| custom | local1 | | block | 0 |+--------+---------+-------------+--------------+---------+| custom | local2 | | block | 0 |+--------+---------+-------------+--------------+---------+| custom | local3 | | block | 0 |+--------+---------+-------------+--------------+---------+| custom | local4 | | block | 0 |+--------+---------+-------------+--------------+---------+| custom | remote1 | | block | 0 |+--------+---------+-------------+--------------+---------+| custom | remote2 | | block | 0 |+--------+---------+-------------+--------------+---------+| custom | remote3 | | block | 0 |+--------+---------+-------------+--------------+---------+
3. Create a network
MicroCloud requires an uplink network that the cluster members can use for external connectivity. See Networking for more information.
Complete the following steps to set up this network:
Create a bridge network without any parameters:
lxc network create microbr0
Enter the following commands to find out the assigned IPv4 and IPv6 addresses for the network and note them down:
lxc network get microbr0 ipv4.address
lxc network get microbr0 ipv6.address
4. Create and configure your VMs
Next, we’ll create the VMs that will serve as the MicroCloud cluster members.
Complete the following steps:
Create the VMs, but don’t start them yet:
lxc init ubuntu:22.04 micro1 --vm --config limits.cpu=2 --config limits.memory=2GiB
lxc init ubuntu:22.04 micro2 --vm --config limits.cpu=2 --config limits.memory=2GiB
lxc init ubuntu:22.04 micro3 --vm --config limits.cpu=2 --config limits.memory=2GiB
lxc init ubuntu:22.04 micro4 --vm --config limits.cpu=2 --config limits.memory=2GiB
Tip
LXD downloads the image the first time you use it to initialise a VM. Therefore, the init command will take longer to complete on the first run. For subsequent runs, LXD uses the cached image.
Therefore, you shouldn’t run these commands in parallel.
Attach the disks to the VMs:
lxc storage volume attach disks local1 micro1
lxc storage volume attach disks local2 micro2
lxc storage volume attach disks local3 micro3
lxc storage volume attach disks local4 micro4
lxc storage volume attach disks remote1 micro1
lxc storage volume attach disks remote2 micro2
lxc storage volume attach disks remote3 micro3
Create and add network interfaces that use the dedicated MicroCloud network to each VM:
lxc config device add micro1 eth1 nic network=microbr0 name=eth1
lxc config device add micro2 eth1 nic network=microbr0 name=eth1
lxc config device add micro3 eth1 nic network=microbr0 name=eth1
lxc config device add micro4 eth1 nic network=microbr0 name=eth1
Start the VMs:
lxc start micro1
lxc start micro2
lxc start micro3
lxc start micro4
5. Install MicroCloud on each VM
Before you can create the MicroCloud cluster, you must install the required snaps on each VM. In addition, you must configure the network interfaces so they can be used by MicroCloud.
Complete the following steps on each VM (micro1, micro2, micro3, and micro4):
Access the shell in the VM. For example, for
micro1:lxc exec micro1 -- bash
Tip
If you get an error message stating that the LXD VM agent is not currently running, the VM hasn’t fully started up yet. Wait a while and then try again. If the error persists, try restarting the VM (
lxc restart micro1).Configure the network interface connected to
microbr0to not accept any IP addresses (because MicroCloud requires a network interface that doesn’t have an IP address assigned):echo 0 > /proc/sys/net/ipv6/conf/enp6s0/accept_ra
Note
enp6s0is the name that the VM assigns to the network interface that we previously added aseth1.Bring the network interface up:
ip link set enp6s0 up
Install the required snaps:
snap install microceph --channel=quincy/stable --cohort="+"
snap install microovn --channel=22.03/stable --cohort="+"
snap install microcloud --channel=latest/stable --cohort="+"
Note
The
--cohort="+"flag in the command ensures that the same version of the snap is installed on all machines. See Keep cluster members in sync for more information.The LXD snap is already installed. Refresh it to the latest version:
snap refresh lxd --channel=5.21/stable --cohort="+"
6. Initialise MicroCloud
After installing all snaps on all VMs, you can initialise MicroCloud.
This initialisation is done on one of the machines only.
We use micro1, but you can choose another machine.
Complete the following steps:
Access the shell in
micro1:lxc exec micro1 -- bash
Start the initialisation process:
microcloud init
Tip
In this tutorial, we initialise MicroCloud interactively. Alternatively, you can use a preseed file for Non-interactive configuration.
Answer the questions:
As the address for MicroCloud’s internal traffic, select the listed IPv4 address.
Select
yesto limit the search for other MicroCloud servers to the local subnet.Select all listed servers (these should be
micro2,micro3, andmicro4).Select
yesto set up local storage.Select the listed local disks (
local1,local2,local3, andlocal4).Tip
Type
localto display only the local disks. The table is filtered by the characters that you type.You don’t need to wipe any disks (because we just created them).
Select
yesto set up distributed storage.Select
yesto confirm that there are fewer disks available than machines.Select all listed disks (these should be
remote1,remote2, andremote3).You don’t need to wipe any disks (because we just created them).
You don’t need to encrypt any disks to get started.
Select
yesto optionally configure the CephFS distributed file system.Leave the question empty for the IPv4 or IPv6 CIDR subnet address used for the Ceph internal network.
Select
yesto configure distributed networking.Select all listed network interfaces (these should be
enp6s0on the four different VMs).Specify the IPv4 address that you noted down for your
microbr0network as the IPv4 gateway.Specify an IPv4 address in the address range as the first IPv4 address. For example, if your IPv4 gateway is
192.0.2.1/24, the first address could be192.0.2.100.Specify a higher IPv4 address in the range as the last IPv4 address. As we’re setting up four machines only, the range must contain a minimum of four addresses, but setting up a bigger range is more fail-safe. For example, if your IPv4 gateway is
192.0.2.1/24, the last address could be192.0.2.254.Specify the IPv6 address that you noted down for your
microbr0network as the IPv6 gateway.
MicroCloud will now initialise the cluster. See About the initialisation process for more information.
See the full initialisation process here:
root@micro1:~# microcloud initSelect an address for MicroCloud's internal traffic:Space to select; enter to confirm; type to filter results.Up/down to move; right to select all; left to select none. +----------------------+--------+ | ADDRESS | IFACE | +----------------------+--------+> [X] | 203.0.113.169 | enp5s0 | [ ] | 2001:db8:d:100::169 | enp5s0 | +----------------------+--------+ Using address "203.0.113.169" for MicroCloud Limit search for other MicroCloud servers to 203.0.113.169/24? (yes/no) [default=yes]: yesScanning for eligible servers ...Space to select; enter to confirm; type to filter results.Up/down to move; right to select all; left to select none. +---------+--------+---------------+ | NAME | IFACE | ADDR | +---------+--------+---------------+> [x] | micro3 | enp5s0 | 203.0.113.171 | [x] | micro2 | enp5s0 | 203.0.113.170 | [x] | micro4 | enp5s0 | 203.0.113.172 | +---------+--------+---------------+ Selected "micro3" at "203.0.113.171" Selected "micro2" at "203.0.113.170" Selected "micro4" at "203.0.113.172" Would you like to set up local storage? (yes/no) [default=yes]: yesSelect exactly one disk from each cluster member:Space to select; enter to confirm; type to filter results.Up/down to move; right to select all; left to select none. +----------+---------------+----------+------+------------------------------------------------------+ | LOCATION | MODEL | CAPACITY | TYPE | PATH | +----------+---------------+----------+------+------------------------------------------------------+ [x] | micro1 | QEMU HARDDISK | 10.00GiB | scsi | /dev/disk/by-id/scsi-0QEMU_QEMU_HARDDISK_lxd_local1 | [ ] | micro1 | QEMU HARDDISK | 20.00GiB | scsi | /dev/disk/by-id/scsi-0QEMU_QEMU_HARDDISK_lxd_remote1 | [x] | micro2 | QEMU HARDDISK | 10.00GiB | scsi | /dev/disk/by-id/scsi-0QEMU_QEMU_HARDDISK_lxd_local2 | [ ] | micro2 | QEMU HARDDISK | 20.00GiB | scsi | /dev/disk/by-id/scsi-0QEMU_QEMU_HARDDISK_lxd_remote2 | [x] | micro3 | QEMU HARDDISK | 10.00GiB | scsi | /dev/disk/by-id/scsi-0QEMU_QEMU_HARDDISK_lxd_local3 | [ ] | micro3 | QEMU HARDDISK | 20.00GiB | scsi | /dev/disk/by-id/scsi-0QEMU_QEMU_HARDDISK_lxd_remote3 |> [x] | micro4 | QEMU HARDDISK | 10.00GiB | scsi | /dev/disk/by-id/scsi-0QEMU_QEMU_HARDDISK_lxd_local4 | +----------+---------------+----------+------+------------------------------------------------------+ Select which disks to wipe:Space to select; enter to confirm; type to filter results.Up/down to move; right to select all; left to select none. +----------+---------------+----------+------+------------------------------------------------------+ | LOCATION | MODEL | CAPACITY | TYPE | PATH | +----------+---------------+----------+------+------------------------------------------------------+> [ ] | micro1 | QEMU HARDDISK | 10.00GiB | scsi | /dev/disk/by-id/scsi-0QEMU_QEMU_HARDDISK_lxd_local1 | [ ] | micro2 | QEMU HARDDISK | 10.00GiB | scsi | /dev/disk/by-id/scsi-0QEMU_QEMU_HARDDISK_lxd_local2 | [ ] | micro3 | QEMU HARDDISK | 10.00GiB | scsi | /dev/disk/by-id/scsi-0QEMU_QEMU_HARDDISK_lxd_local3 | [ ] | micro4 | QEMU HARDDISK | 10.00GiB | scsi | /dev/disk/by-id/scsi-0QEMU_QEMU_HARDDISK_lxd_local4 | +----------+---------------+----------+------+------------------------------------------------------+ Using "/dev/disk/by-id/scsi-0QEMU_QEMU_HARDDISK_lxd_local3" on "micro3" for local storage pool Using "/dev/disk/by-id/scsi-0QEMU_QEMU_HARDDISK_lxd_local4" on "micro4" for local storage pool Using "/dev/disk/by-id/scsi-0QEMU_QEMU_HARDDISK_lxd_local1" on "micro1" for local storage pool Using "/dev/disk/by-id/scsi-0QEMU_QEMU_HARDDISK_lxd_local2" on "micro2" for local storage pool Would you like to set up distributed storage? (yes/no) [default=yes]: yesUnable to find disks on some systems. Continue anyway? (yes/no) [default=yes]: yesSelect from the available unpartitioned disks:Space to select; enter to confirm; type to filter results.Up/down to move; right to select all; left to select none. +----------+---------------+----------+------+------------------------------------------------------+ | LOCATION | MODEL | CAPACITY | TYPE | PATH | +----------+---------------+----------+------+------------------------------------------------------+> [x] | micro1 | QEMU HARDDISK | 20.00GiB | scsi | /dev/disk/by-id/scsi-0QEMU_QEMU_HARDDISK_lxd_remote1 | [x] | micro2 | QEMU HARDDISK | 20.00GiB | scsi | /dev/disk/by-id/scsi-0QEMU_QEMU_HARDDISK_lxd_remote2 | [x] | micro3 | QEMU HARDDISK | 20.00GiB | scsi | /dev/disk/by-id/scsi-0QEMU_QEMU_HARDDISK_lxd_remote3 | +----------+---------------+----------+------+------------------------------------------------------+ Select which disks to wipe:Space to select; enter to confirm; type to filter results.Up/down to move; right to select all; left to select none. +----------+---------------+----------+------+------------------------------------------------------+ | LOCATION | MODEL | CAPACITY | TYPE | PATH | +----------+---------------+----------+------+------------------------------------------------------+> [ ] | micro1 | QEMU HARDDISK | 20.00GiB | scsi | /dev/disk/by-id/scsi-0QEMU_QEMU_HARDDISK_lxd_remote1 | [ ] | micro2 | QEMU HARDDISK | 20.00GiB | scsi | /dev/disk/by-id/scsi-0QEMU_QEMU_HARDDISK_lxd_remote2 | [ ] | micro3 | QEMU HARDDISK | 20.00GiB | scsi | /dev/disk/by-id/scsi-0QEMU_QEMU_HARDDISK_lxd_remote3 | +----------+---------------+----------+------+------------------------------------------------------+ Using 1 disk(s) on "micro1" for remote storage pool Using 1 disk(s) on "micro2" for remote storage pool Using 1 disk(s) on "micro3" for remote storage pool Do you want to encrypt the selected disks? (yes/no) [default=no]: noWould you like to set up CephFS remote storage? (yes/no) [default=yes]: yesConfigure distributed networking? (yes/no) [default=yes]: yesSelect an available interface per system to provide external connectivity for distributed network(s):Space to select; enter to confirm; type to filter results.Up/down to move; right to select all; left to select none. +----------+--------+----------+ | LOCATION | IFACE | TYPE | +----------+--------+----------+> [x] | micro2 | enp6s0 | physical | [x] | micro3 | enp6s0 | physical | [x] | micro1 | enp6s0 | physical | [x] | micro4 | enp6s0 | physical | +----------+--------+----------+ Using "enp6s0" on "micro3" for OVN uplink Using "enp6s0" on "micro1" for OVN uplink Using "enp6s0" on "micro2" for OVN uplink Using "enp6s0" on "micro4" for OVN uplink Specify the IPv4 gateway (CIDR) on the uplink network (empty to skip IPv4): 192.0.2.1/24Specify the first IPv4 address in the range to use on the uplink network: 192.0.2.100Specify the last IPv4 address in the range to use on the uplink network: 192.0.2.254Specify the IPv6 gateway (CIDR) on the uplink network (empty to skip IPv6): 2001:db8:d:200::1/64Specify the DNS addresses (comma-separated IPv4 / IPv6 addresses) for the distributed network (default: 192.0.2.1,2001:db8:d:200::1): Initializing a new cluster Local MicroCloud is ready Local LXD is ready Local MicroOVN is ready Local MicroCeph is readyAwaiting cluster formation ... Peer "micro2" has joined the cluster Peer "micro3" has joined the cluster Peer "micro4" has joined the clusterCluster initialization is completeMicroCloud is ready7. Inspect your MicroCloud setup
You can now inspect your cluster setup.
Tip
You can run these commands on any of the cluster members.
We continue using micro1, but you will see the same results on the other VMs.
Inspect the cluster setup:
root@micro1:~#lxc cluster list+--------+----------------------------+------------------+--------------+----------------+-------------+--------+-------------------+| NAME | URL | ROLES | ARCHITECTURE | FAILURE DOMAIN | DESCRIPTION | STATE | MESSAGE |+--------+----------------------------+------------------+--------------+----------------+-------------+--------+-------------------+| micro1 | https://203.0.113.169:8443 | database-leader | x86_64 | default | | ONLINE | Fully operational || | | database | | | | | |+--------+----------------------------+------------------+--------------+----------------+-------------+--------+-------------------+| micro2 | https://203.0.113.170:8443 | database | x86_64 | default | | ONLINE | Fully operational |+--------+----------------------------+------------------+--------------+----------------+-------------+--------+-------------------+| micro3 | https://203.0.113.171:8443 | database | x86_64 | default | | ONLINE | Fully operational |+--------+----------------------------+------------------+--------------+----------------+-------------+--------+-------------------+| micro4 | https://203.0.113.172:8443 | database-standby | x86_64 | default | | ONLINE | Fully operational |+--------+----------------------------+------------------+--------------+----------------+-------------+--------+-------------------+root@micro1:~#microcloud cluster list+--------+--------------------+----------+------------------------------------------------------------------+--------+| NAME | ADDRESS | ROLE | FINGERPRINT | STATUS |+--------+--------------------+----------+------------------------------------------------------------------+--------+| micro1 | 203.0.113.169:9443 | voter | 47a74cb2ed8b844544ce71f45e96acb2c8021d4c1ffc2f1f449cdbf2f6898fd8 | ONLINE |+--------+--------------------+----------+------------------------------------------------------------------+--------+| micro2 | 203.0.113.170:9443 | voter | 56bee3adbd5e1de2186dd22788baffd5e1358e408ec3d9b713ed930741a339f2 | ONLINE |+--------+--------------------+----------+------------------------------------------------------------------+--------+| micro3 | 203.0.113.171:9443 | voter | aabdd5f64d4c2796a50d6ce9d91939f248bfeb27195426158dff05d660f93f86 | ONLINE |+--------+--------------------+----------+------------------------------------------------------------------+--------+| micro4 | 203.0.113.172:9443 | stand-by | 649ec21815135104f1faa5fca099daddf995f554119c6e34706a2b31681ad1d7 | ONLINE |+--------+--------------------+----------+------------------------------------------------------------------+--------+root@micro1:~#microceph cluster list+--------+--------------------+----------+------------------------------------------------------------------+--------+| NAME | ADDRESS | ROLE | FINGERPRINT | STATUS |+--------+--------------------+----------+------------------------------------------------------------------+--------+| micro1 | 203.0.113.169:7443 | voter | a2b370cce1deb02437b583aa73be5e5c519aed75f02f4b98f6df150fd62c648a | ONLINE |+--------+--------------------+----------+------------------------------------------------------------------+--------+| micro2 | 203.0.113.170:7443 | voter | e37ea1acd14b984152cac4cb861cbe35ac438151233b9d0ee606c44c2e27d759 | ONLINE |+--------+--------------------+----------+------------------------------------------------------------------+--------+| micro3 | 203.0.113.171:7443 | voter | 152ccf372ecc93faffa8a6801cedd5eca49d977eea72e3f2239245cc22965399 | ONLINE |+--------+--------------------+----------+------------------------------------------------------------------+--------+| micro4 | 203.0.113.172:7443 | stand-by | 9b75b396f6d59481b8c14221942d775cff4d27c5621b0b541eb5ba3245618093 | ONLINE |+--------+--------------------+----------+------------------------------------------------------------------+--------+root@micro1:~#microovn cluster list+--------+--------------------+----------+------------------------------------------------------------------+--------+| NAME | ADDRESS | ROLE | FINGERPRINT | STATUS |+--------+--------------------+----------+------------------------------------------------------------------+--------+| micro1 | 203.0.113.169:6443 | voter | a552d316c159a50a4e11253c36a1cd25a3902bee50e24ed1e073ee7728be0410 | ONLINE |+--------+--------------------+----------+------------------------------------------------------------------+--------+| micro2 | 203.0.113.170:6443 | voter | 2c779eb10409576a33fa01a29cede39abea61f7cd6a07837c369858b515ed02a | ONLINE |+--------+--------------------+----------+------------------------------------------------------------------+--------+| micro3 | 203.0.113.171:6443 | voter | 7f76cddfdbbe3d768c343b1a5f402842565c25d0e4e3ebbc8514263fc14ea28b | ONLINE |+--------+--------------------+----------+------------------------------------------------------------------+--------+| micro4 | 203.0.113.172:6443 | stand-by | 5d62b2a63dec514c45c07b24ff93e2bd83ad8b9af4ab774aad3d2ac51ee102d5 | ONLINE |+--------+--------------------+----------+------------------------------------------------------------------+--------+Inspect the storage setup:
root@micro1:~#lxc storage list+-----------+--------+--------------------------------------------+---------+---------+| NAME | DRIVER | DESCRIPTION | USED BY | STATE |+-----------+--------+--------------------------------------------+---------+---------+| local | zfs | Local storage on ZFS | 8 | CREATED |+-----------+--------+--------------------------------------------+---------+---------+| remote | ceph | Distributed storage on Ceph | 1 | CREATED |+-----------+--------+--------------------------------------------+---------+---------+| remote-fs | cephfs | Distributed file-system storage using Ceph | 1 | CREATED |+-----------+--------+--------------------------------------------+---------+---------+root@micro1:~#lxc storage info localinfo:description: Local storage on ZFSdriver: zfsname: localspace used: 747.00KiBtotal space: 9.20GiBused by:volumes:- backups (location "micro1")- backups (location "micro2")- backups (location "micro3")- backups (location "micro4")- images (location "micro1")- images (location "micro2")- images (location "micro3")- images (location "micro4")root@micro1:~#lxc storage info remoteinfo:description: Distributed storage on Cephdriver: cephname: remotespace used: 25.41KiBtotal space: 29.67GiBused by:profiles:- defaultroot@micro1:~#lxc storage info remote-fsinfo:description: Distributed file-system storage using CephFSdriver: cephfsname: remote-fsspace used: 0Btotal space: 29.67GiBused by: {}Inspect the OVN network setup:
root@micro1:~#lxc network list+---------+----------+---------+-----------------+--------------------------+-------------+---------+---------+| NAME | TYPE | MANAGED | IPV4 | IPV6 | DESCRIPTION | USED BY | STATE |+---------+----------+---------+-----------------+--------------------------+-------------+---------+---------+| UPLINK | physical | YES | | | | 1 | CREATED |+---------+----------+---------+-----------------+--------------------------+-------------+---------+---------+| br-int | bridge | NO | | | | 0 | |+---------+----------+---------+-----------------+--------------------------+-------------+---------+---------+| default | ovn | YES | 198.51.100.1/24 | 2001:db8:d960:91cf::1/64 | | 1 | CREATED |+---------+----------+---------+-----------------+--------------------------+-------------+---------+---------+| enp5s0 | physical | NO | | | | 0 | |+---------+----------+---------+-----------------+--------------------------+-------------+---------+---------+| enp6s0 | physical | NO | | | | 1 | |+---------+----------+---------+-----------------+--------------------------+-------------+---------+---------+| lxdovn1 | bridge | NO | | | | 0 | |+---------+----------+---------+-----------------+--------------------------+-------------+---------+---------+root@micro1:~#lxc network show defaultconfig:bridge.mtu: "1442"ipv4.address: 198.51.100.1/24ipv4.nat: "true"ipv6.address: 2001:db8:d960:91cf::1/64ipv6.nat: "true"network: UPLINKvolatile.network.ipv4.address: 192.0.2.100volatile.network.ipv6.address: 2001:db8:e647:610d:216:3eff:fe96:ed5cdescription: ""name: defaulttype: ovnused_by:- /1.0/profiles/defaultmanaged: truestatus: Createdlocations:- micro1- micro3- micro2- micro4Make sure that you can ping the virtual router within OVN. You can find the IPv4 and IPv6 addresses of the virtual router under
volatile.network.ipv4.addressandvolatile.network.ipv6.address, respectively, in the output oflxc network show default.root@micro1:~#ping 192.0.2.100PING 192.0.2.100 (192.0.2.100) 56(84) bytes of data.64 bytes from 192.0.2.100: icmp_seq=1 ttl=253 time=2.05 ms64 bytes from 192.0.2.100: icmp_seq=2 ttl=253 time=2.01 ms64 bytes from 192.0.2.100: icmp_seq=3 ttl=253 time=1.78 ms^C--- 192.0.2.100 ping statistics ---4 packets transmitted, 3 received, 25% packet loss, time 3005msrtt min/avg/max/mdev = 1.777/1.945/2.052/0.120 msroot@micro1:~#ping6 -n 2001:db8:e647:610d:216:3eff:fe96:ed5cPING 2001:db8:e647:610d:216:3eff:fe96:ed5c(2001:db8:e647:610d:216:3eff:fe96:ed5c) 56 data bytes64 bytes from 2001:db8:e647:610d:216:3eff:fe96:ed5c: icmp_seq=1 ttl=253 time=1.61 ms64 bytes from 2001:db8:e647:610d:216:3eff:fe96:ed5c: icmp_seq=2 ttl=253 time=1.99 ms64 bytes from 2001:db8:e647:610d:216:3eff:fe96:ed5c: icmp_seq=3 ttl=253 time=15.7 ms^C--- 2001:db8:e647:610d:216:3eff:fe96:ed5c ping statistics ---3 packets transmitted, 3 received, 0% packet loss, time 2004msrtt min/avg/max/mdev = 1.606/6.432/15.704/6.558 msInspect the default profile:
root@micro1:~#lxc profile show defaultconfig: {}description: ""devices:eth0:name: eth0network: defaulttype: nicroot:path: /pool: remotetype: diskname: defaultused_by: []
8. Launch some instances
Now that your MicroCloud cluster is ready to use, let’s launch a few instances:
Launch an Ubuntu container with the default settings:
lxc launch ubuntu:22.04 u1
Launch another Ubuntu container, but use the local storage instead of the remote storage that is the default:
lxc launch ubuntu:22.04 u2 --storage local
Launch an Ubuntu VM:
lxc launch ubuntu:22.04 u3 --vm
Check the list of instances. You will see that the instances are running on different cluster members.
root@micro1:~#lxc list+------+---------+---------------------+----------------------------------------------+-----------------+-----------+----------+| NAME | STATE | IPV4 | IPV6 | TYPE | SNAPSHOTS | LOCATION |+------+---------+---------------------+----------------------------------------------+-----------------+-----------+----------+| u1 | RUNNING | 198.51.100.2 (eth0) | 2001:db8:d960:91cf:216:3eff:fe4e:9642 (eth0) | CONTAINER | 0 | micro1 |+------+---------+---------------------+----------------------------------------------+-----------------+-----------+----------+| u2 | RUNNING | 198.51.100.3 (eth0) | 2001:db8:d960:91cf:216:3eff:fe79:6765 (eth0) | CONTAINER | 0 | micro3 |+------+---------+---------------------+----------------------------------------------+-----------------+-----------+----------+| u3 | RUNNING | 198.51.100.4 (eth0) | 2001:db8:d960:91cf:216:3eff:fe66:f24b (eth0) | VIRTUAL-MACHINE | 0 | micro2 |+------+---------+---------------------+----------------------------------------------+-----------------+-----------+----------+Check the storage. You will see that the instance volumes are located on the specified storage pools.
root@micro1:~#lxc storage volume list remote+-----------------+------------------------------------------------------------------+-------------+--------------+---------+----------+| TYPE | NAME | DESCRIPTION | CONTENT-TYPE | USED BY | LOCATION |+-----------------+------------------------------------------------------------------+-------------+--------------+---------+----------+| container | u1 | | filesystem | 1 | |+-----------------+------------------------------------------------------------------+-------------+--------------+---------+----------+| image | 17fbc145125c659b7ef926b2de5e5304370083e28846f084a0d514c7a96777bc | | block | 1 | |+-----------------+------------------------------------------------------------------+-------------+--------------+---------+----------+| image | 45613e262f8a5fc9467330f679862147c289516f045e3edc313e07ebcb0aab4a | | filesystem | 1 | |+-----------------+------------------------------------------------------------------+-------------+--------------+---------+----------+| virtual-machine | u3 | | block | 1 | |+-----------------+------------------------------------------------------------------+-------------+--------------+---------+----------+root@micro1:~#lxc storage volume list local+-----------+------------------------------------------------------------------+-------------+--------------+---------+----------+| TYPE | NAME | DESCRIPTION | CONTENT-TYPE | USED BY | LOCATION |+-----------+------------------------------------------------------------------+-------------+--------------+---------+----------+| container | u2 | | filesystem | 1 | micro3 |+-----------+------------------------------------------------------------------+-------------+--------------+---------+----------+| custom | backups | | filesystem | 1 | micro2 |+-----------+------------------------------------------------------------------+-------------+--------------+---------+----------+| custom | backups | | filesystem | 1 | micro3 |+-----------+------------------------------------------------------------------+-------------+--------------+---------+----------+| custom | backups | | filesystem | 1 | micro4 |+-----------+------------------------------------------------------------------+-------------+--------------+---------+----------+| custom | backups | | filesystem | 1 | micro1 |+-----------+------------------------------------------------------------------+-------------+--------------+---------+----------+| custom | images | | filesystem | 1 | micro2 |+-----------+------------------------------------------------------------------+-------------+--------------+---------+----------+| custom | images | | filesystem | 1 | micro3 |+-----------+------------------------------------------------------------------+-------------+--------------+---------+----------+| custom | images | | filesystem | 1 | micro4 |+-----------+------------------------------------------------------------------+-------------+--------------+---------+----------+| custom | images | | filesystem | 1 | micro1 |+-----------+------------------------------------------------------------------+-------------+--------------+---------+----------+| image | 45613e262f8a5fc9467330f679862147c289516f045e3edc313e07ebcb0aab4a | | filesystem | 1 | micro3 |+-----------+------------------------------------------------------------------+-------------+--------------+---------+----------+
9. Inspect your networking
The instances that you have launched are all on the same subnet. You can, however, create a different network to isolate some instances from others.
Check the list of instances that are running:
root@micro1:~#lxc list+------+---------+---------------------+----------------------------------------------+-----------------+-----------+----------+| NAME | STATE | IPV4 | IPV6 | TYPE | SNAPSHOTS | LOCATION |+------+---------+---------------------+----------------------------------------------+-----------------+-----------+----------+| u1 | RUNNING | 198.51.100.2 (eth0) | 2001:db8:d960:91cf:216:3eff:fe4e:9642 (eth0) | CONTAINER | 0 | micro1 |+------+---------+---------------------+----------------------------------------------+-----------------+-----------+----------+| u2 | RUNNING | 198.51.100.3 (eth0) | 2001:db8:d960:91cf:216:3eff:fe79:6765 (eth0) | CONTAINER | 0 | micro3 |+------+---------+---------------------+----------------------------------------------+-----------------+-----------+----------+| u3 | RUNNING | 198.51.100.4 (eth0) | 2001:db8:d960:91cf:216:3eff:fe66:f24b (eth0) | VIRTUAL-MACHINE | 0 | micro2 |+------+---------+---------------------+----------------------------------------------+-----------------+-----------+----------+Access the shell in
u1:lxc exec u1 -- bash
Ping the IPv4 address of
u2:root@u1:~#ping 198.51.100.3PING 198.51.100.3 (198.51.100.3) 56(84) bytes of data.64 bytes from 198.51.100.3: icmp_seq=1 ttl=64 time=1.33 ms64 bytes from 198.51.100.3: icmp_seq=2 ttl=64 time=1.74 ms64 bytes from 198.51.100.3: icmp_seq=3 ttl=64 time=0.985 ms^C--- 198.51.100.3 ping statistics ---3 packets transmitted, 3 received, 0% packet loss, time 2004msrtt min/avg/max/mdev = 0.985/1.352/1.739/0.308 msPing the IPv6 address of
u3:root@u1:~#ping6 -n 2001:db8:d960:91cf:216:3eff:fe66:f24bPING 2001:db8:d960:91cf:216:3eff:fe66:f24b(2001:db8:d960:91cf:216:3eff:fe66:f24b) 56 data bytes64 bytes from 2001:db8:d960:91cf:216:3eff:fe66:f24b: icmp_seq=1 ttl=64 time=16.8 ms64 bytes from 2001:db8:d960:91cf:216:3eff:fe66:f24b: icmp_seq=2 ttl=64 time=3.41 ms64 bytes from 2001:db8:d960:91cf:216:3eff:fe66:f24b: icmp_seq=3 ttl=64 time=3.86 ms^C--- 2001:db8:d960:91cf:216:3eff:fe66:f24b ping statistics ---3 packets transmitted, 3 received, 0% packet loss, time 2004msrtt min/avg/max/mdev = 3.407/8.012/16.774/6.197 msConfirm that the instance has connectivity to the outside world:
root@u1:~#ping www.example.comPING www.example.com (93.184.216.34) 56(84) bytes of data.64 bytes from 93.184.216.34 (93.184.216.34): icmp_seq=1 ttl=49 time=111 ms64 bytes from 93.184.216.34 (93.184.216.34): icmp_seq=2 ttl=49 time=95.2 ms64 bytes from 93.184.216.34 (93.184.216.34): icmp_seq=3 ttl=49 time=96.2 ms^C--- www.example.com ping statistics ---3 packets transmitted, 3 received, 0% packet loss, time 2018msrtt min/avg/max/mdev = 95.233/100.870/111.165/7.290 msLog out of the
u1shell:exit
Create an OVN network with the default settings:
lxc network create isolated --type=ovn
There is only one
UPLINKnetwork, so the new network will use this one as its parent.Show information about the new network:
root@micro1:~#lxc network show isolatedconfig:bridge.mtu: "1442"ipv4.address: 198.51.100.201/24ipv4.nat: "true"ipv6.address: 2001:db8:452a:32b2::1/64ipv6.nat: "true"network: UPLINKvolatile.network.ipv4.address: 192.0.2.101volatile.network.ipv6.address: 2001:db8:e647:610d:216:3eff:feef:6361description: ""name: isolatedtype: ovnused_by: []managed: truestatus: Createdlocations:- micro1- micro3- micro2- micro4Check that you can ping the
volatile.network.ipv4.address:root@micro1:~#ping 192.0.2.101PING 192.0.2.101 (192.0.2.101) 56(84) bytes of data.64 bytes from 192.0.2.101: icmp_seq=1 ttl=253 time=1.25 ms64 bytes from 192.0.2.101: icmp_seq=2 ttl=253 time=1.04 ms64 bytes from 192.0.2.101: icmp_seq=3 ttl=253 time=1.68 ms^C--- 192.0.2.101 ping statistics ---3 packets transmitted, 3 received, 0% packet loss, time 2002msrtt min/avg/max/mdev = 1.042/1.321/1.676/0.264 msLaunch an Ubuntu container that uses the new network:
lxc launch ubuntu:22.04 u4 --network isolated
Access the shell in
u4:lxc exec u4 -- bash
Confirm that the instance has connectivity to the outside world:
root@u4:~#ping www.example.comPING www.example.com (93.184.216.34) 56(84) bytes of data.64 bytes from 93.184.216.34 (93.184.216.34): icmp_seq=1 ttl=49 time=95.6 ms64 bytes from 93.184.216.34 (93.184.216.34): icmp_seq=2 ttl=49 time=118 ms64 bytes from 93.184.216.34 (93.184.216.34): icmp_seq=3 ttl=49 time=94.6 ms^C--- www.example.com ping statistics ---3 packets transmitted, 3 received, 0% packet loss, time 2004msrtt min/avg/max/mdev = 94.573/102.587/117.633/10.646 msPing the IPv4 address of
u2:root@u4:~#ping 198.51.100.3PING 198.51.100.3 (198.51.100.3) 56(84) bytes of data.^C--- 198.51.100.3 ping statistics ---14 packets transmitted, 0 received, 100% packet loss, time 13301msYou will see that
u2is not reachable, because it is on a different OVN subnet.
10. Access the UI
Instead of managing your instances and your LXD setup from the command line, you can also use the LXD UI. See How to access the LXD web UI for more information.
Check the LXD cluster list to determine the IP addresses of the cluster members:
root@micro1:~#lxc cluster list+--------+----------------------------+------------------+--------------+----------------+-------------+--------+-------------------+| NAME | URL | ROLES | ARCHITECTURE | FAILURE DOMAIN | DESCRIPTION | STATE | MESSAGE |+--------+----------------------------+------------------+--------------+----------------+-------------+--------+-------------------+| micro1 | https://203.0.113.169:8443 | database-leader | x86_64 | default | | ONLINE | Fully operational || | | database | | | | | |+--------+----------------------------+------------------+--------------+----------------+-------------+--------+-------------------+| micro2 | https://203.0.113.170:8443 | database | x86_64 | default | | ONLINE | Fully operational |+--------+----------------------------+------------------+--------------+----------------+-------------+--------+-------------------+| micro3 | https://203.0.113.171:8443 | database | x86_64 | default | | ONLINE | Fully operational |+--------+----------------------------+------------------+--------------+----------------+-------------+--------+-------------------+| micro4 | https://203.0.113.172:8443 | database-standby | x86_64 | default | | ONLINE | Fully operational |+--------+----------------------------+------------------+--------------+----------------+-------------+--------+-------------------+In your web browser, navigate to the URL of one of the machines. For example, for
micro1, navigate tohttps://203.0.113.169:8443.By default, MicroCloud uses a self-signed certificate, which will cause a security warning in your browser. Use your browser’s mechanism to continue despite the security warning.
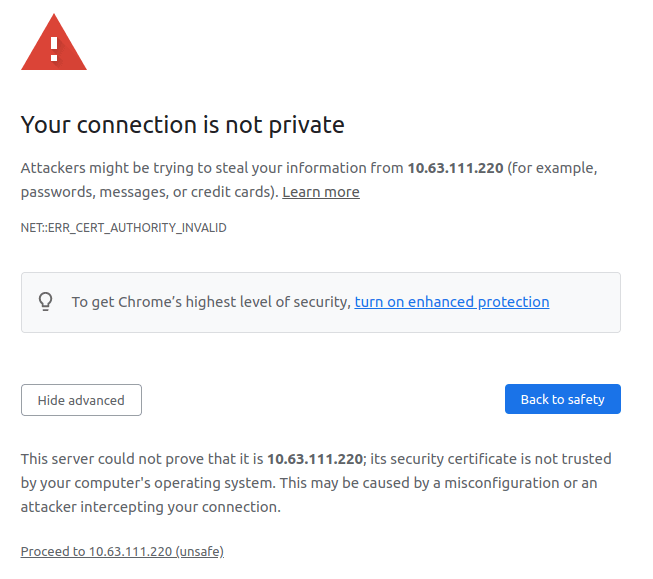
Example for a security warning in Chrome
You should now see the LXD UI, prompting you to set up a certificate.
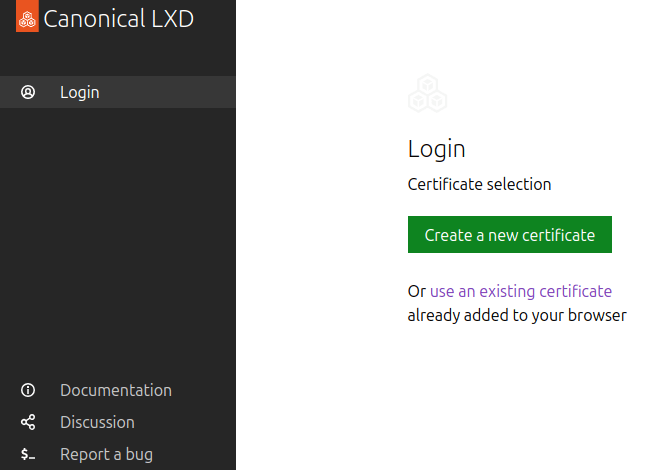
Certificate selection in the LXD UI
Note
Since LXD 5.21, the LXD UI is enabled by default.
If you don’t see the certificate screen, you might have an older version of LXD (run
snap info lxdto check). In this case, run the following commands on the machine that you’re trying to access (for example,micro1) to enable the UI:snap set lxd ui.enable=true systemctl reload snap.lxd.daemon
Follow the instructions in the UI to set up the certificates.
Tip
If you create a new certificate, you must transfer it to one of the cluster members to add it to the trust store.
To do this, use the file push command. For example:
lxc file push lxd-ui.crt micro1/root/lxd-ui.crt
You can then access the shell on that cluster member and add the certificate to the trust store:
lxc exec micro1 -- bash
lxc config trust add lxd-ui.crt
You can now browse the UI and inspect, for example, the instances you created and the networks and storage that MicroCloud set up.
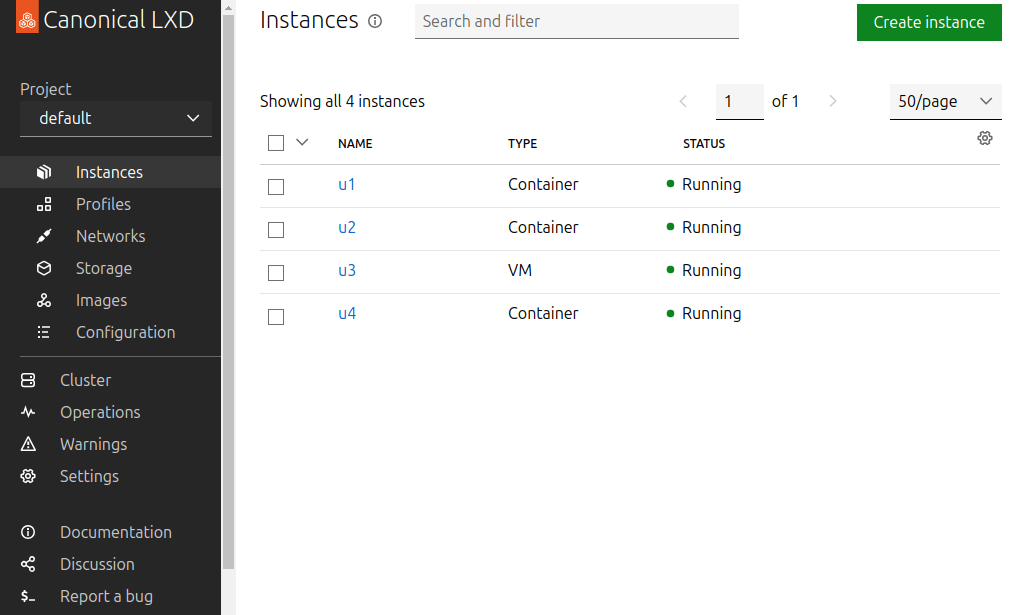
Instances view in the LXD UI
Next steps
Now that your MicroCloud is up and running, you can start using it!
If you’re already familiar with LXD, see How to work with MicroCloud (command cheat sheet) for a reference of the most common commands.
If you’re new to LXD, check out the First steps with LXD tutorial to familiarise yourself with what you can do in LXD. You can skip the first section about installing and initialising LXD, because LXD is already operational as part of your MicroCloud setup.